Showing posts with label Finished. Show all posts

Friday, October 4, 2013

Jade Pullover (Finished!)


Despite crocheting many days away in September, I didn't manage to update my sweet little bloggy corner of the interwebs. The main reason for my neglect was camera issues. The lighting was either terrible, or my battery was dead, or my pictures just weren't what they should be. So I'd wait or forget or put it off until suddenly over a month had passed and not a peep came from this blog.

So today I sit here and have decided: enough! Here's my Jade Pullover, all FINISHED! and cozy and looking quite green. I still need to block it so the sleeves will lay a bit softer, but for now, you get the idea...
 I was about to clean the dirty mirror but I looked up to discover a wasp in this room. Eeeps! So I did what I do and I ran out and shut the door and then told my husband about it when he came home.

 Awkward stance.

I've never been much for taking 'selfies', so these finished sweater shots are a challenge to get right, I guess everyone gets the gist of the sweater, despite my photographic abilities. :)

Now I need to write up the stitch pattern tutorial. I really-really love this stitch, it was fun and fast and repetitive and geometrical and a wee bit floral without being overly complicated. I think it'd make a great tote-bag of sorts, especially with a calico material lining peeking through the diamond-y holes. Mhm!

You know what else I've crocheted in the month and a half it's taken me to get this post together? A poncho, a house (yes, a house), more squares on my queen sized blanket, a lot of hats for care-bags, added rounds to my son's star blanket, Lego finger puppets, and a whole lotta motifs for a sweater I'm working on (at this point it's becoming a compulsion). Now let's see if I can get my camera to cooperate!


Saturday, August 17, 2013

Fast Makes (Finished)

Sometimes you don't want to crochet a blanket or a sweater. Sometimes you want some instant gratification. Sometimes you just want a fast make.

Last weekend I felt like that. Ugh, I don't want to touch you, queen size granny square blanket. Ugh, I've frogged you entirely too much to make you appealing, jade green sweater.

So I made a belt.


And a finger puppet (inspired by this foxy guy).


And, since I'm over run with spider plant babies, this little doily plant hanger (inspired by dottie angel).

Fast,
cute,
fun,
yes.

Have a Lovely Day!
~Jess

***

Thursday, June 13, 2013

The Circus Sweater (Finished!!)

I finished it!
The Circus Sweater!
Weeeeee!!!


I'm happy.
Some details....
The Circus Sweater's inspiration and general instructions can be found at Genuine MudPie's Blog .
I changed some of the details for my sweater a bit.
 -I used fingering weight yarn (Bamboo & Ewe via JoAnn Etc) and a 4mm hook
 -I tweaked the sweater to my own measurements (it ended up being a snugger fit than the original)
 -I crocheted in a Sedge Stitch (tutorial to come)
 -I didn't change my stitch for the stripes, but continued on with the sedge stitch.
You can check out my progress by following these links: Picked a Perfect One,  Work in Progress, Come Together.

Whew, I'm tired.
I still have a yoga mat bag to make.
I may (or may not) be making a bedspread.
But for today, I'm finished.
Finished is good.
(Is it Autumn yet?! I wanna wear my sweater!)
Have a Lovely Day!
~Jess

***

Wednesday, June 5, 2013

Any 10 Squares Bag (Finished! and a simple How-To)

I made this bag on a whim. All you need is 10 squares of the same shape. They can be any square pattern, but I used the Sunburst Granny for my first attempt because it's such a beautiful stitch. I think my squares measured 4.5" across. Tweaking the size of the square will tweak the size of the bag (so, uh, that was probably obvious information, but it's relevant to point out, nonetheless). Anyway, you can join as you go (as I did) or stitch them all together after.
10 Squares total

6 will lie flat; 4 will be folded


Hopefully my pictures make it easy to see how the bag was assembled. I have 3 flat squares on each side- 2 for the top corners, 1 for the center (3 x 2 = 6). For the other 4 squares, they are folded squares that give the bag its bag shape. They were a bit trickier to join, but I managed, as you see.

Oh, you haven't seen.
Well, you should.
Take a peek!
 Ooooh sah petty!

 I have a friend who is an amazing seamstress. She's going to make a liner for the bag. I don't know if it's necessary, but it will help it keep it's shape and stay useable for years.


 To finish, I hdc around.


For the handle, I joined the yarn to the top corner of the bag. I chained 60, slip stitched into the opposite corner (on the same side- that's important). I sc into the next stitch, skipped 2 stitches and worked 5dc in the 3rd stitch. *Skip 2 stitches, 1 sc in 3rd stitch, skip 2 stitches, 5dc in 3rd stitch * across. When I got to the end I slip stitched into the corner and fastened off.


This bag is destined for a charity sale, but I think I'll make another one using a solid color in an interesting motif. Sah-petty!

Have a Lovely Day!
~Jess

***

Friday, May 17, 2013

My Lumpy, Loopy Crocheted Top (finished!)

It's finished!
Whew.
First, excessive pictures.
Then, excessive words.


Yes, my mirror is broken. We're in the market for a legit full length mirror instead of these
$5 ones intended for a dorm-room. In the meantime, the broken mirror is what I work with.


Where does ones hands go during a self portrait? I'll never know.

Blurred front view.

Somewhat clearer back view

Nicely folded (unlike the rest of my laundry)

Lumpy. And Loopy.

Belt for sinching
 The structure of this top is incredibly easy. If you can make a granny square (or any kind of crocheted square), you can make this. Each square is approximately 4.5" x 4.5", so this top will fit anyone size XS through L, I imagine. It's easy enough to shrink it down or make it bigger- either make your squares larger or smaller OR add in more squares in general (across, and at the shoulders). Here's a link to the *very basic and not even a little bit in English* "pattern" I followed. I think they may have done the sleeves a bit differently. No matter.

I love the look of this top, but I'm a bit disappointed with my squares. I tweaked what was available to me, and I noticed the squares were a bit on the lumpy side and dismissed it. For some reason I thought it would work itself out. Yeah, not so much. Still, I think it's pretty cute despite the lumpy, loopy look, and I intend to wear it (and just do better next time).

I am *loving* this crocheted clothes thing. Why didn't I pick it up sooner?


Have a Lovely Day!
~Jess

***

Tuesday, April 2, 2013

Solar System Baby Blanket (finished!)

 It's done! Well, mostly. I was going to add in a constellation, but right now I'm recovering from, you know, creating a solar system. Fatiguing work, that.

 The sun.

 Mercury, Venus, Earth (moon!), Mars, Saturn...

 Mars, Saturn, Jupiter...

 Uranus, Neptune, PLUTO (because Pluto is a planet too! Take that, NASA scientists!)!

Lest you think this is impressive, I'll point out that it took me over 2 weeks to create this blanket, while God made the whole universe in 6 days. Just sayin'. ;)

Can't wait to *hand* deliver this blanket to the boy himself! 1 week to go!!


Have a Lovely Day!
~Jess

***

Saturday, March 23, 2013

Yellow! (Finished!)


 I can show off this project now: Tah-Dah! A super simple blanket I made for a friend! She's getting married in approximately 2 months -today was the bridal shower- and at the moment is a quite in love with the color yellow (as well as her fiance... should probably mention him too).


I found some granny square blankets on Pinterest that were solid like this and found it surprisingly beautiful. I like the hidden "X"s that pop out when you look from afar.


Just a 7 round granny square, joined-as-you-go, with an ecru white border (I opted for 2dc clusters, as you see, for a speedy finish).


It's not huge; just a throw size. JoAnn's stopped carrying this color yellow. Good thing I bought as much as I did!!

Tasseled corners. They're for fun.


Here's an up close view of the tassels. I love the simplicity of the blanket- as long as the color matches, this blanket will look appropriate anywhere. Of course after I wrapped it up the thought occurred to me to add some doilies to it Dottie Angel style, but oh well. It is what it is, as they say. :)


Saturday, February 16, 2013

The Dress

Here it is.
The Dress.
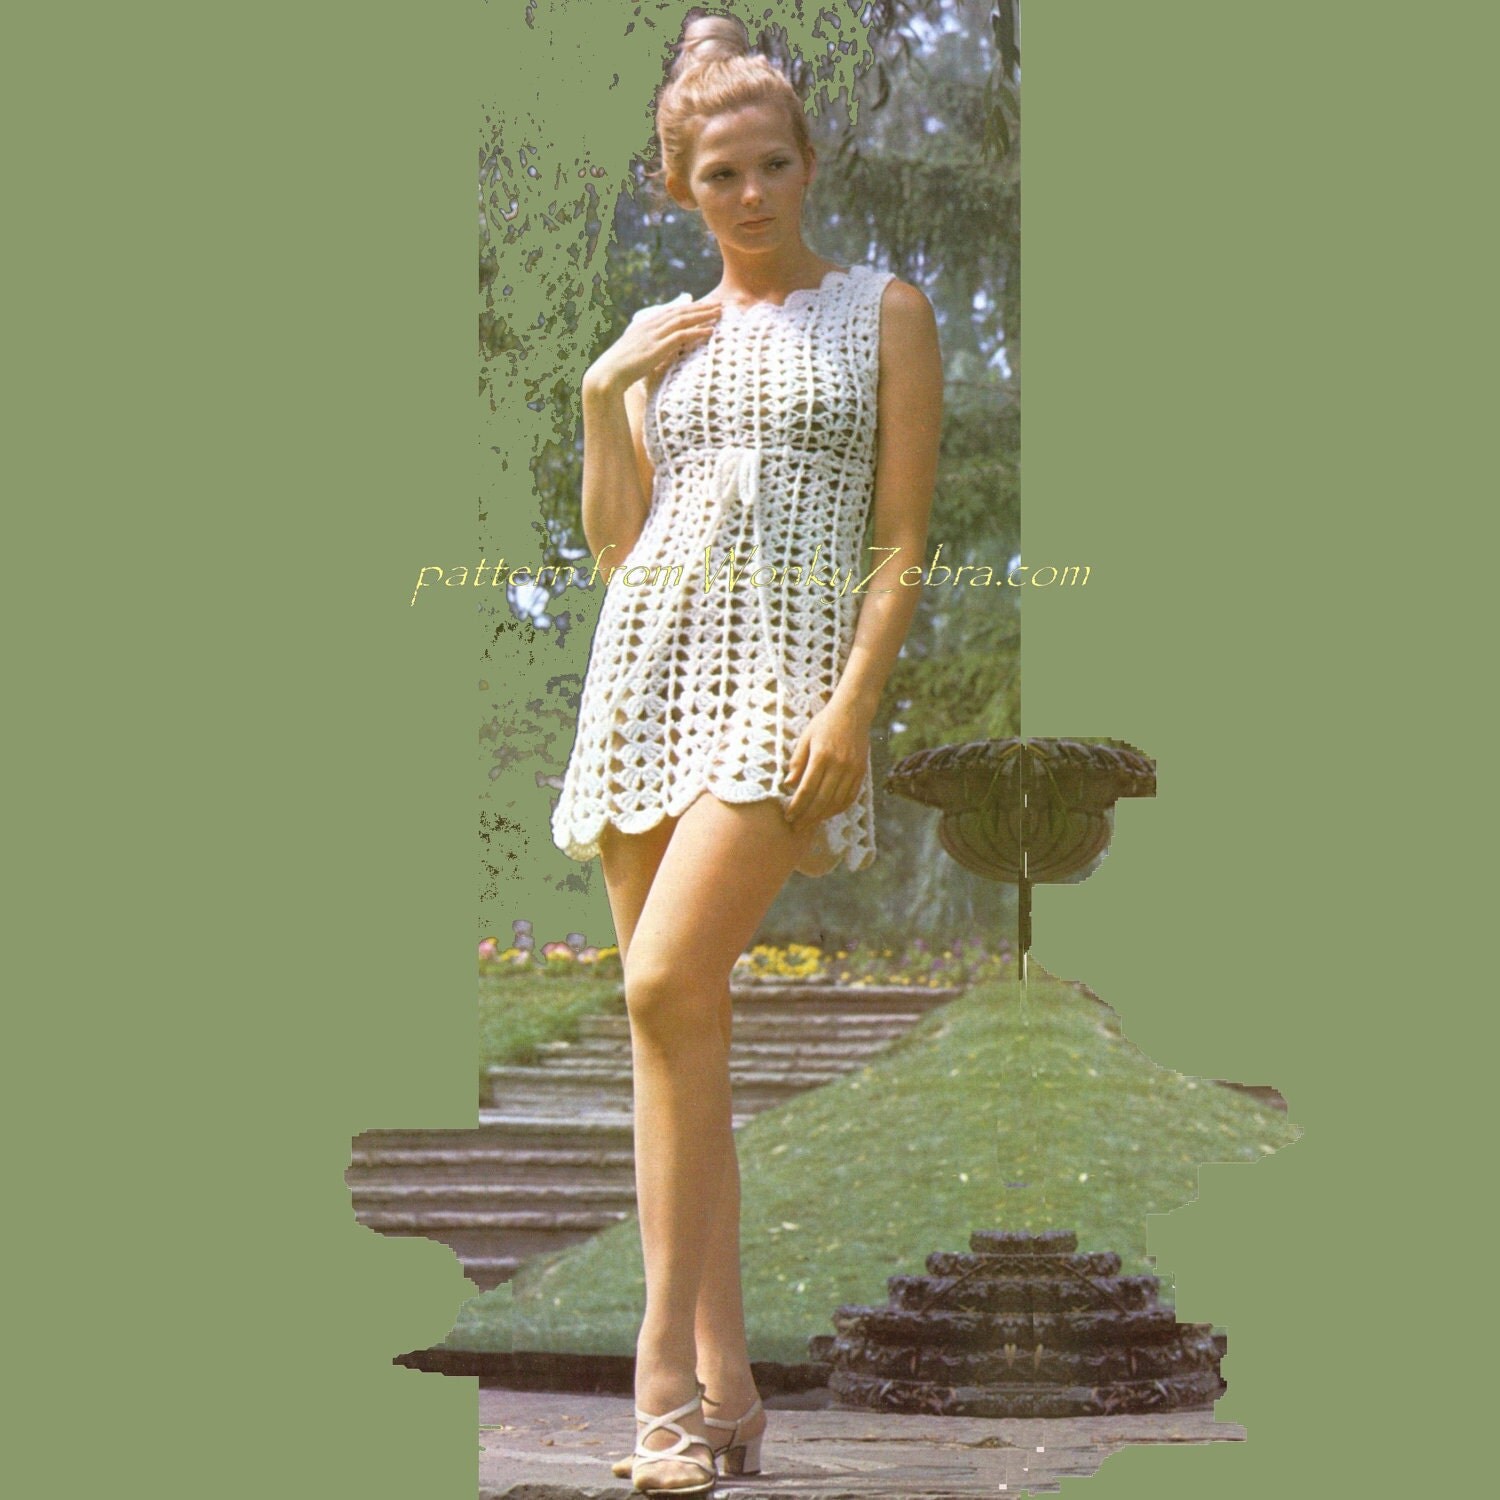
The Dress is a vintage pattern from the 1960s. See?

Crochet Dress Pattern PDF Vintage Goddess Dress 169 from WonkyZebra

 So cute! So simple! And, little did I know, so fast and easy to create! WonkyZebra has oodles of vintage patterns. I ordered this, the "Goddess Dress" and the PDF arrived in my gmail account by the time I next checked it. She included some helpful notes on yarn weight, UK to US conversion (slightly different stitch lingo), and vintage hooks and their contemporary sizes. This was my first dress, and my first vintage pattern and one of my first patterns from the UK, so you can imagine how immensely thankful I was for all the tips- without which this could have easily turned into a disaster of a project.

Armed with my pattern, my notes, a tape measure for accuracy, my hook and 3 skeins of cotton yarn (yes, less than $10 in yarn!) I got to work.

I could have finished it in 2 evenings (yes, it's that fast), but I noticed an error and had to frog out a few rows (rawr!!). But, the pattern is so easy, it wasn't a big deal. I pushed onward, and last night it was d-o-n-e.


 Everyone needs dirty mirror bathroom pictures of themselves on the internet. It's a rite of passage.

 You can see my sheath here. I was fretting over what to wear with it. Then I remembered I had a dress that came with one barely sewn into it. I snipped it out and -voila!- just a hem away from being ready to wear.

As you can see, the lighting was poor today. It's snowing/raining/grossing outside. My goal this week is to retake these pictures on a sunny day and update this blog post. Someone hold me to it!!

So, if you have...
~ medium size crochet hook (you'll have to work with a few to get accurate tension. I went with a 5mm, despite the pattern recommending a 4.5mm)
~ scissors
~ yarn needle
~ tape measure
~ 3-4 skeins of worsted weight yarn
~ an Etsy account
and
~ an email address
then,
you can make The Dress, too!

...I'm still wearing mine. =P