Monday, April 9, 2012

The Granny of All Bags (How-To)

You may remember the

Well.
It's D-O-N-E!

And holy cannoli, it's huge! 
I'm pretty sure it's bigger than I am. 
You can fit a large toddler in this thing... not that I tried. 
I don't have to try, it's obvious.

Anyway, here it is, in it's humungous Granny of All Bags glory...


Already stuffed with yarn for the next project. Check back for *that* project. It's a good one. I'm in LoVe! 

I left the pattern right after I finished my giant granny square. I just didn't feel like doing all those single crochet stitches called for. Laaaa zeeeee. So really, it's nothing at all like what the pattern dictated. And I'm pretty sure it's bigger than the pattern dictated. I didn't note the yarn type, the hook size, the gauge... yeah, none of that. So keep in mind what your tools are before you jump into this thing. Smaller hook and thinner yarn = smaller bag. Which I plan to make as well. :)

Here's a simplified version of my steps for all you lovely crocheters. Sorry this isn't a tutorial. Nor is it really a pattern.... it's just a how-to. Any questions, leave 'em in the comments section and I'll try my very best to answer them!

The Granny of All Bags: How-To
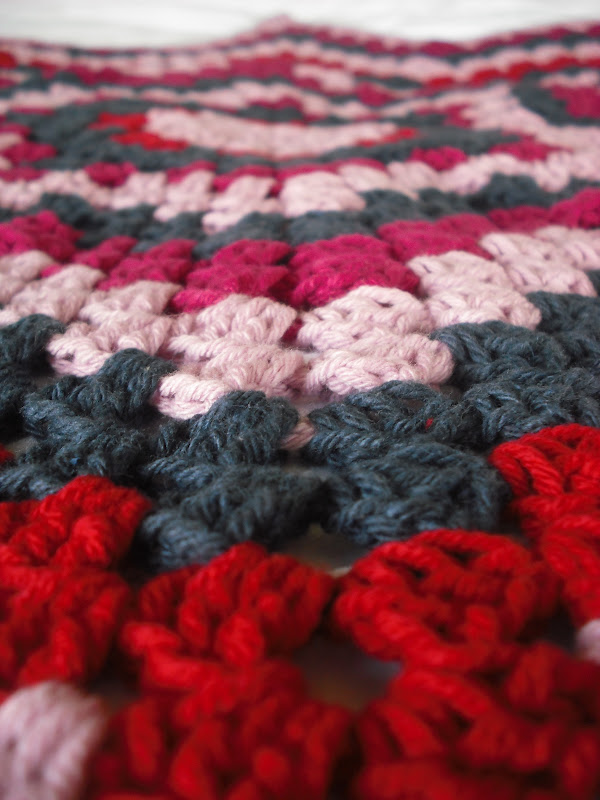
1) Make a granny square. Mine was 26 rounds. Huge. This sucker definitely isn't a purse. I guess it could be, if you have a lot of loot and don't mind putting a liner in it. Weave in all your ends and clean it up a bit.
2) Fold in half with right sides together. Join yarn to both sides and single crochet into every chain one space. This will pull your side closed. Go around the corner and into the top for the first 5-8 chain one spaces (just use your judgement and personal preferences. There's not better way). Fast off, repeat this step on the opposite side.
3) Now that your sides are decreased, you're going work your granny stitch (3dc, ch1) across one side of the opening of the bag. Continue for 3 or 4 rows, then tuck your handle in and *around the handle* slip stitch the last row worked with the first row worked. Make sense? Oh, good. :) Repeat that on the other side.
4) Weave in your ends. Be shocked at how comical it initially looks. Then fall in love with it's funky retro-fabulous good looks.
5) Stuff your yarn inside. Take it everywhere you crochet!

***

Saturday, March 31, 2012

~Soon to be Free~ (Coming Soon)

Like free patterns?
Meeeee too.
:)

The below fingerless gloves are Soon to be FREE patterns!
I just have to get around to typing it up 
and posting it here.


Check back here to see when that may happen, 
~OR~
"Like" me on Facebook....
to receive that update, as well as lots of other great sneak peeks, good finds, and random musings.

Wednesday, March 28, 2012

Owl Make a Motif (Free!)

(This page has been getting quite a bit of action the past couple of months- welcome to all those who found Purple Chair Crochet via Pinterest! Feel free to snoop around- my *free* patterns are linked on the right side of the page, and if you're interested in something a bit more challenging, check out Purple Chair Crochet on Etsy, where I offer crochet patterns emailed to you in PDF form. :) Ok, now back to the Owls!!)


Hmm, what to make.
Oh.
"Owl Make a Motif"!
;)


These little guys were inspired by Pinterest,
but came from my own brain... 
uh, at the same time.


They're small (as you see below, being modeled by my son, Booger aka Jet aka The Professor).


They're fast (begging for a friend, or two... or three).

Like the basket? That's their new nest. The pattern is available with my other free patterns- check the links to the RIGHT. You may have to scroll upwards a bit. A little bit more. Right there, see it? 

They're colorful (weeeeee, color!)


And I bet you want to know...


How did I make these?

The Professor requested this owl have green eyes.

Well, I'll tell you.

First, gather your things...
3 colors of worsted weight cotton yarn. 
white cotton yarn (eyes)
color for beak (red, yellow or orange)
safety eyes or extra bits of dark colored yarn
yarn needle
scissors
4mm crochet hook.

Got all that? Great!

For the body...
RND 1: Ch4, join with sl st to first ch create a loop. ch2 (counts as first dc), 15 dc in ring around. Join with sl st to first dc. fasten off (16 dc)
RND 2: Join new color, ch2, dc in same space. In each stitch around work *2dctog, ch1 *. Join with sl st to first dc. Fasten off (16 2dctog)
RND 3: Join new color, ch2 (counts as first dc), 2dc in ch sp of previous rnd. In next ch sp work *3dc, ch 2, 3dc *. Work 3dc in each sp around the next 13 ch spaces. In next ch space work *3dc, ch 2, 3dc *.  3dc in next ch sp, then join with slip stitch to first dc. Fasten off. (see your owl? he's almost here!)

For the eyes... (create 2)
RND 1: Ch2 (or magic circle) leaving a long "tail" off of your slip knot. In first ch work 12 dc stitches. Join with sl st to first dc. Fasten off. Pull center tail firmly to close the circle. 

Finally....
With your beak color, create a beak using the center of your motif as your starting place. Next, sew eyes into place as desired (refer to pictures if needed) and affix safety eyes or embroider eyelids.

And that's all there is to it! :):) Make a million!


Tuesday, March 27, 2012

Fat Bottom Bag (WIP)

There I sat, doing my Pinterest thing.
Click, pin.
Click, pin.
Click, laugh, pin.

When I scrolled across this:

Image courtesy of winkieflash
This is the Fat Bottom Bag. It's beyond beautiful! So incredibly simple! Immediately smitten, I followed the source of the picture to a Ravelry page. (If you're a knitter or a crocheter it's essential for you to create a username and password for this gLORious website.) And -woohoo- as luck would have it the pattern was available for free.

So if you feel like a quick project that's beautiful, handy, fast and fun....

also known as 29-210-44 Striped Bag
(but that's not a very catchy name)

I'm using left over yarn from the Berry Smoothie Berry Beautiful Star Blankie I just made for my cousins soon-to-arrive daughter. I'm super excited! And I have to get back to crocheting. I'm 10 rounds in, 20 to go and then the shaping begins!

My work in progress as shown by my crummy camera phone! 

***


Thursday, March 22, 2012

Berry Beautiful Blankie (Finished!)

The Berry Smoothie Star Blankie is 

CoMPLeTeD!
***


These star blankets are a treat to create! They work up quick as can be and give the same vibes as a granny square blanket, but they're punchy, unexpected, and unique.

And I love 'em. =)

I've already made one for my 3-year-old son (in honor of his 3-year birthday), and this one is a special gift for a special little girl. (It's a surprise though, so I'd appreciate if you didn't mention it to her, or her parents for that matter. Thanks.)

If this blankie has you twiddling your crochet hook, check out the pattern here >> The Hook Hound: Granny Star Pattern. You won't be sorry!

And if you don't crochet (shame, really), you can always contact me for details on a custom order blanket. I don't mind, promise!

Have a LoveLy day!
***

Monday, March 19, 2012

Berry Smoothie Star Blankie (WIP)

Hurray! I have a WIP going on this week!
Presenting, 
for your viewing pleasure:
 The Berry Smoothie Star Blankie!


I took these last week while I was waiting for *more yarn* to come in from Lion Brand. But I'll give you all the details when I'm d-o-n-e. In the mean time, I hope you enjoyed this sneak peek!!

***
*Like Purple Chair Crochet on Facebook!

Saturday, March 10, 2012

Give Me Color! (Inspiration)

Lately, I've been pooping out on my crochet projects.
I start in a frenzy of optimism.
Then I get bored.
Set them down.
And haven't had the drive to pick them back up.


I was pondering this lately, 
trying to figure out what the common theme was in each of these projects.


They're
all
one
color.


I think part of the drive to 
FINISH!
something is changing the colors.


Some of the projects I haven't finished are:
The Bed of Roses blanket (2 colors- gorgeous, oh my, yes, but pretty monotonous)
2 Purses - both a solid color. One is navy blue, the other a pretty peacock purple.

Gorgeous yarn all around, 
but alas,
no color changes.  


I've decided, therefore, it either needs to be
COLORFUL
or
fast!!


And I'd prefer both, since I'm on the subject. ;) 


A stack of squares- colorful and fast.


A flowery chandelier- colorful and fast.

This beauty needs some better pictures to show off it's bright side.
That'll be in the works, methinks. :)
A scrappy granny throw
colorful
and
fast.
=)

***
Whew, glad I got all that out. 
No more boring, tedious, unending crochet projects for me.
Give me c o l o r with my Crochet 

Hope you have 
a
Lovely Day!